To implement routing in a Vue application, we have to make use of the package vue-router. In this article, we will look at how to install the required package and also implementing routing in Vue application.
We will begin by creating a new application using Vue CLI.
❯ vue create routing-demo
Once, the installation is complete, we can navigate to the folder and run the server to load the application.
❯ cd routing-demo
❯ npm run serve
This will run our server on port 8080 by default http://localhost:8080/
Installing vue-router
We will begin by installing the vue-router package required for routing. We can install it using CDN, npm or yarn.
npm:
npm install vue-router@4
yarn:
yarn add vue-router@4
Once the package is installed, we can integrate it with our Vue application.
Implementation
To register the router, we will make changes in the main.js file.
We will need to import createRouter and createWebHistory from the vue-router package.
// main.js
import { createRouter, createWebHistory } from "vue-router";

const router = createRouter({
  history: createWebHistory(),
  routes: [
    //...
  ],
});

app.use(router);
createRouter is used for creating a new router instance where we can specify our configuration.
createWebHistory helps in navigation by creating history object using the HTML5 history API.
The routes property will contain information about the pages your application will use.
The entire main.js file will now contain the following code.
// main.js

import { createApp } from "vue";
import { createRouter, createWebHistory } from "vue-router";
import App from "./App.vue";

const app = createApp(App);

const router = createRouter({
  history: createWebHistory(),
  routes: [
    //...
  ],
});

app.use(router);
app.mount("#app");
In this application, we will have two pages about and contact. Let’s create the components for both.
// Terminal
❯ touch src/components/AboutUs.vue
❯ touch src/components/ContactUs.vue
Let’s add some code to both the files.
<!--  AboutUs.vue -->

<template>
  <h1>This is about page</h1>
</template>
The ContactUs.vue component:
<!-- ContactUs.vue -->

<template>
  <h1>This is contact page</h1>
</template>
We want these pages to be available on URL /about and /contact. We can specify this in the router instance, under the routes property.
// main.js

import AboutUs from "./components/AboutUs.vue";
import ContactUs from "./components/ContactUs.vue";

const router = createRouter({
  history: createWebHistory(),
  routes: [
    {
      path: "/about",
      component: AboutUs,
    },
    {
      path: "/contact",
      component: ContactUs,
    },
  ],
});
The routes will be an array of objects, in our case, we will specify two properties path and component. The path is the URL path which in our case is /about and /contact. The component will take the name of the component to display the content.
The entire main.js file:
// main.js

import { createApp } from "vue";
import { createRouter, createWebHistory } from "vue-router";
import App from "./App.vue";

import AboutUs from "./components/AboutUs.vue";
import ContactUs from "./components/ContactUs.vue";

const app = createApp(App);

const router = createRouter({
  history: createWebHistory(),
  routes: [
    {
      path: "/about",
      component: AboutUs,
    },
    {
      path: "/contact",
      component: ContactUs,
    },
  ],
});

app.use(router);
app.mount("#app");
In order for the above code to work, we should specify the location where the components should get displayed. This is done using the tag <router-view> which gets replaced by the component.
<router-view></router-view>
We also want the link for both the pages to be displayed on our application so that user can navigate by clicking the links. This can be done by using the <router-link> component where we can specify the path using the to attribute.
<router-link to="/about">About</router-link> |
<router-link to="/contact">Contact</router-link>;
For our application, we can make use of the App.vue component to declare both <router-view> and <router-link> components.
<!-- App.vue -->

<template>
  <router-link to="/about">About</router-link> |
  <router-link to="/contact">Contact</router-link>
  <router-view></router-view>
</template>

<script>
export default {
  name: "App",
};
</script>
Let’s run the server and open up the application on our browser.
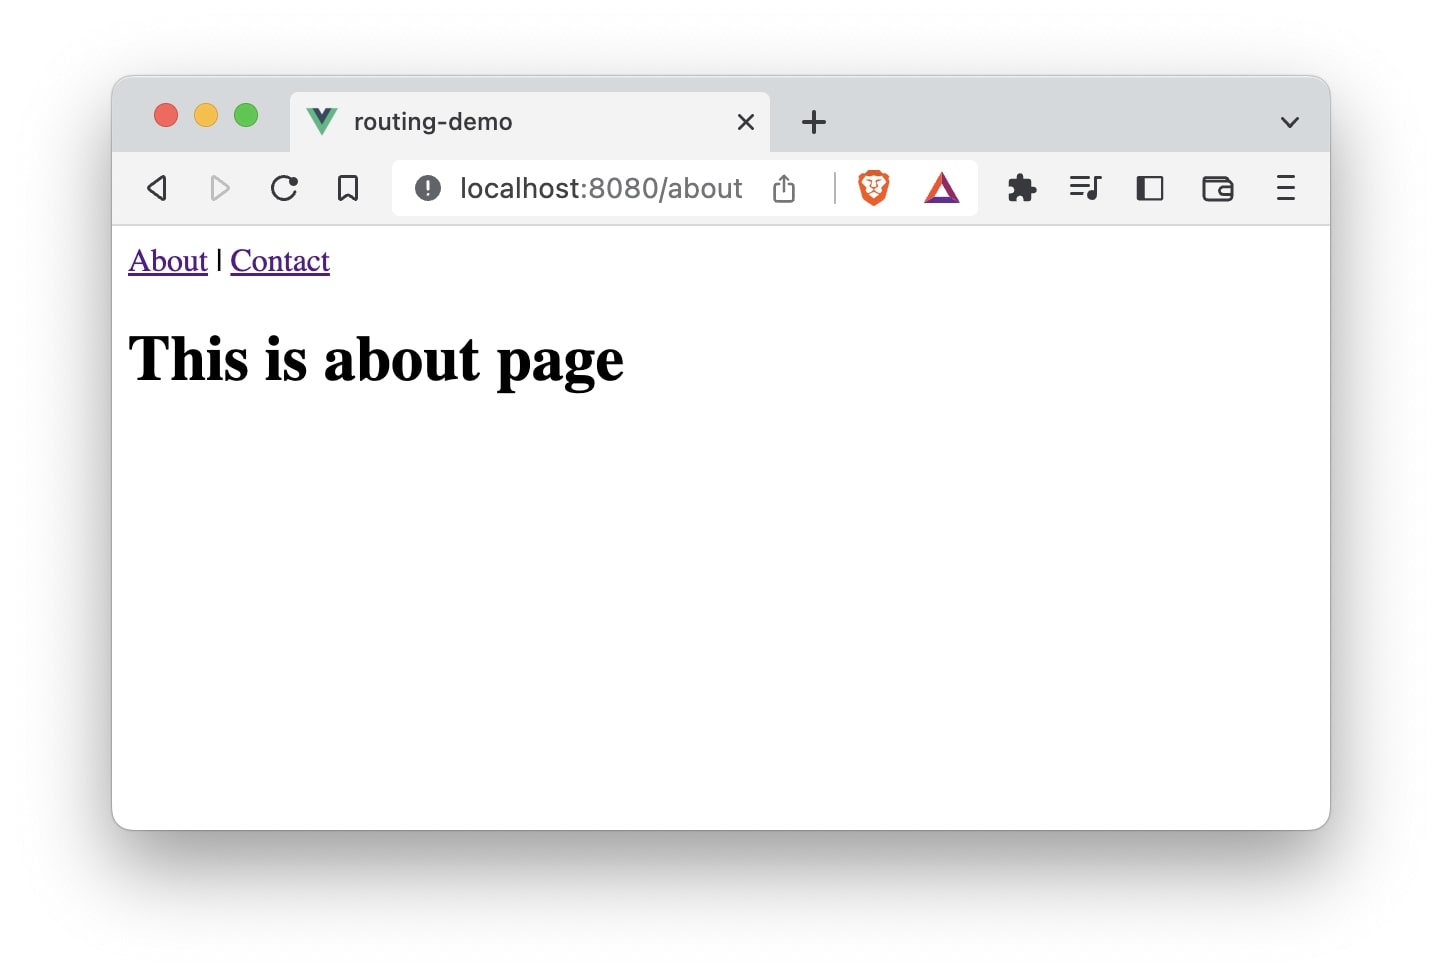

As you can see, both, the URL and the content, changes once the user clicks the link.