When using the <router-link> component of vue-router, it automatically applies two CSS classes called .router-link-active and .router-link-exact-active.
The .router-link-active class gets applied even if there is a partial match in URL whereas, .router-link-exact-active gets applied only when there is an exact match of the path.
In this article, we will look at how to style an active link using the .router-link-active class.
We will begin by creating a new application using Vue CLI.
❯ vue create active-link-demo
Once, the installation is complete, we can navigate to the folder and run the server to load the application.
❯ cd active-link-demo
❯ npm run serve
This will run our server on port 8080 by default http://localhost:8080/
Next, we will install the vue-router package required for routing. We can install it using CDN, npm or yarn.
npm:
npm install vue-router@4
yarn:
yarn add vue-router@4
Once the package is installed, we can integrate it with our Vue application.
To register the router, we will make changes in the main.js file.
// main.js

import { createApp } from "vue";
import { createRouter, createWebHistory } from "vue-router";
import App from "./App.vue";

const app = createApp(App);

app.mount("#app");

const router = createRouter({
  history: createWebHistory(),
  routes: [
    //...
  ],
});

app.use(router);
In this application, we will have two pages about and contact. Let’s create the components for both.
// Terminal
❯ touch src/components/AboutUs.vue
❯ touch src/components/ContactUs.vue
Let’s add some code to both the files.
<!-- AboutUs.vue -->

<template>
  <h1>This is about page</h1>
</template>
The ContactUs.vue component:
<!-- ContactUs.vue -->

<template>
  <h1>This is contact page</h1>
</template>
We want these pages to be available on URL /about and /contact. We can specify this in the router instance, under the routes property.
Let’s specify paths for both the components in main.js file:
// main.js

import { createApp } from "vue";
import { createRouter, createWebHistory } from "vue-router";
import App from "./App.vue";

import AboutUs from "./components/AboutUs.vue";
import ContactUs from "./components/ContactUs.vue";

const app = createApp(App);

const router = createRouter({
  history: createWebHistory(),
  routes: [
    {
      path: "/about",
      component: AboutUs,
    },
    {
      path: "/contact",
      component: ContactUs,
    },
  ],
});

app.use(router);
app.mount("#app");
For our application, we can make use of the App.vue component to declare both <router-view> and <router-link> components.
<!-- App.vue -->

<template>
  <router-link to="/about">About</router-link> |
  <router-link to="/contact">Contact</router-link>
  <router-view></router-view>
</template>

<script>
export default {
  name: "App",
};
</script>
Let’s run the server and open up the application on our browser.
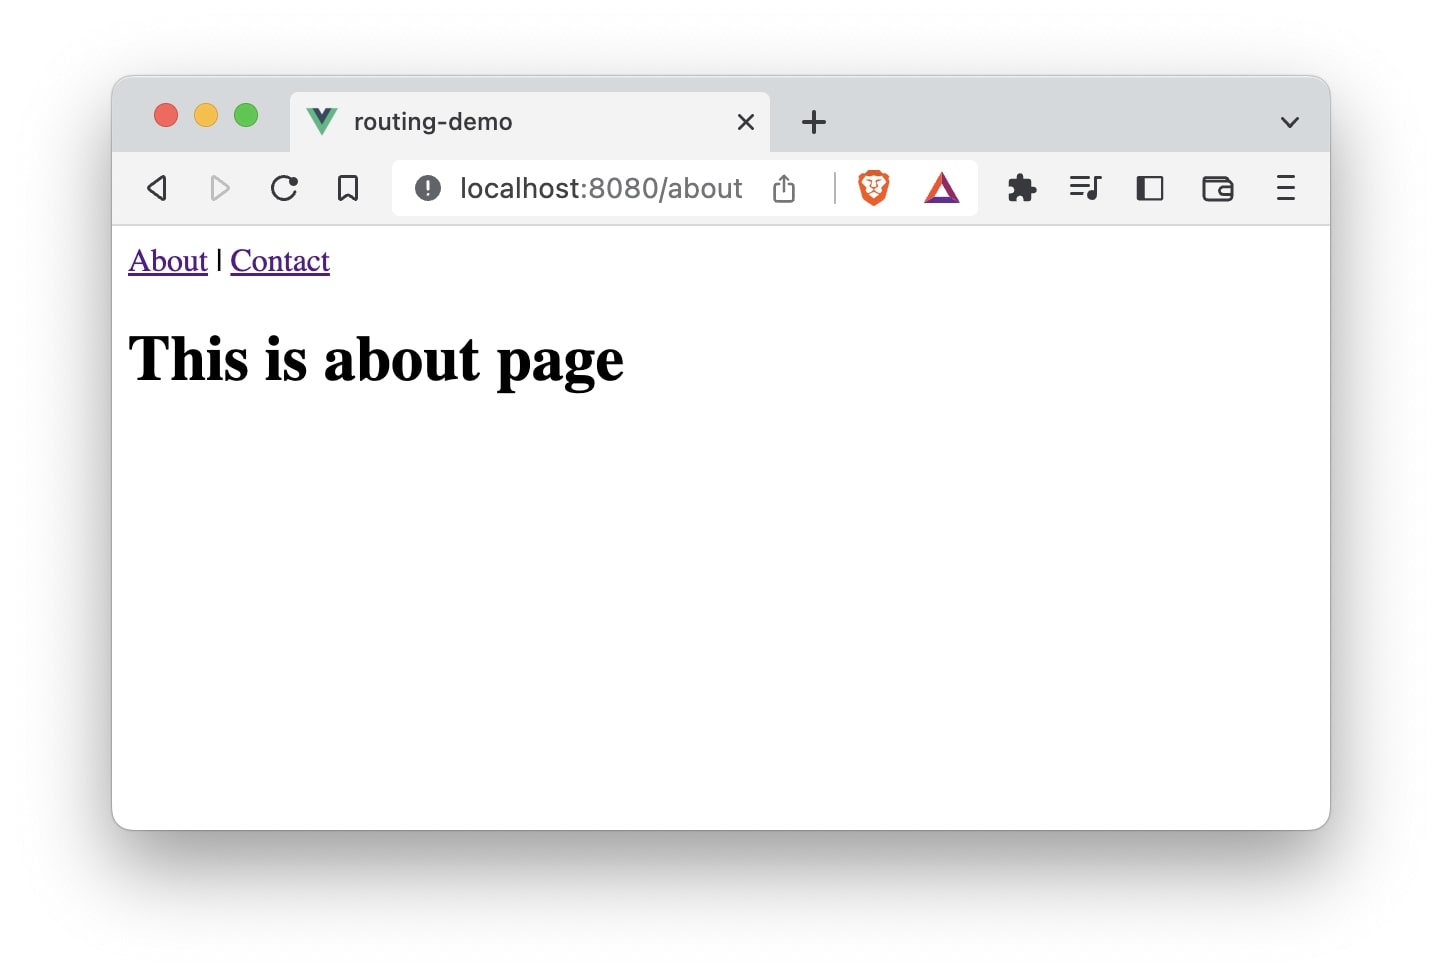

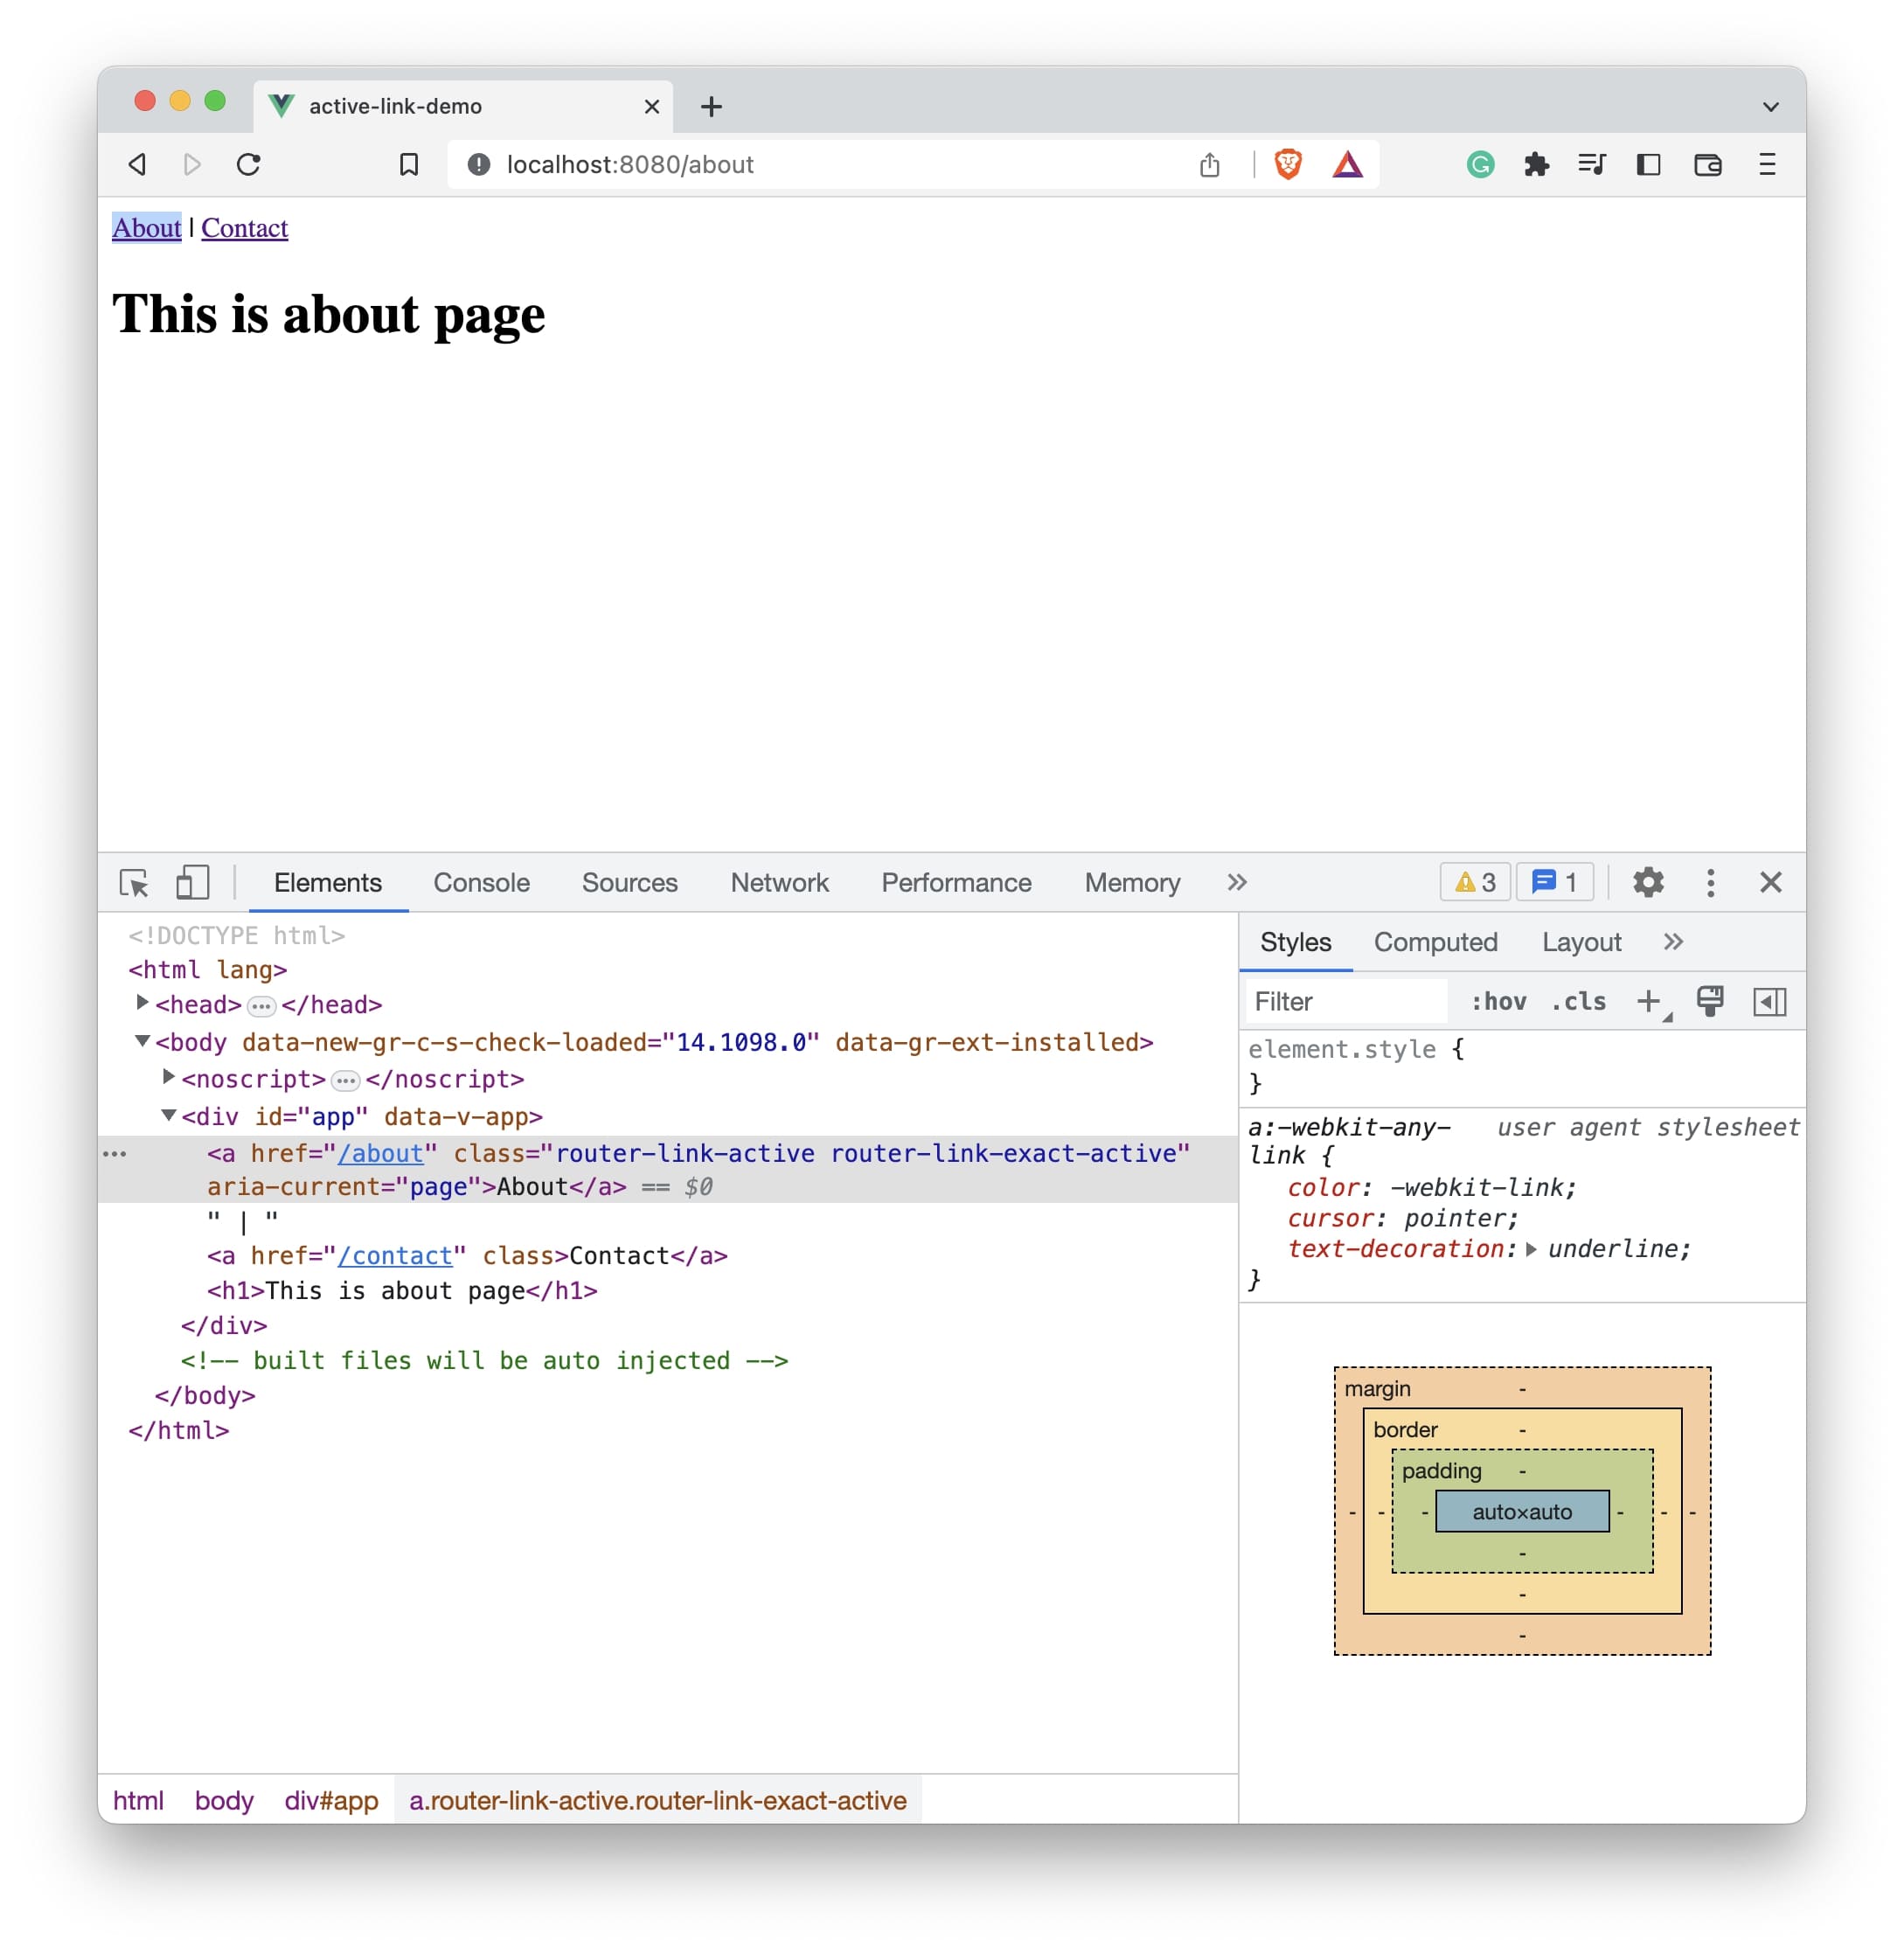
As you can see, both, the URL and the content, changes once the user clicks the link but we are unable to identify which link is clicked.
router-link-active class
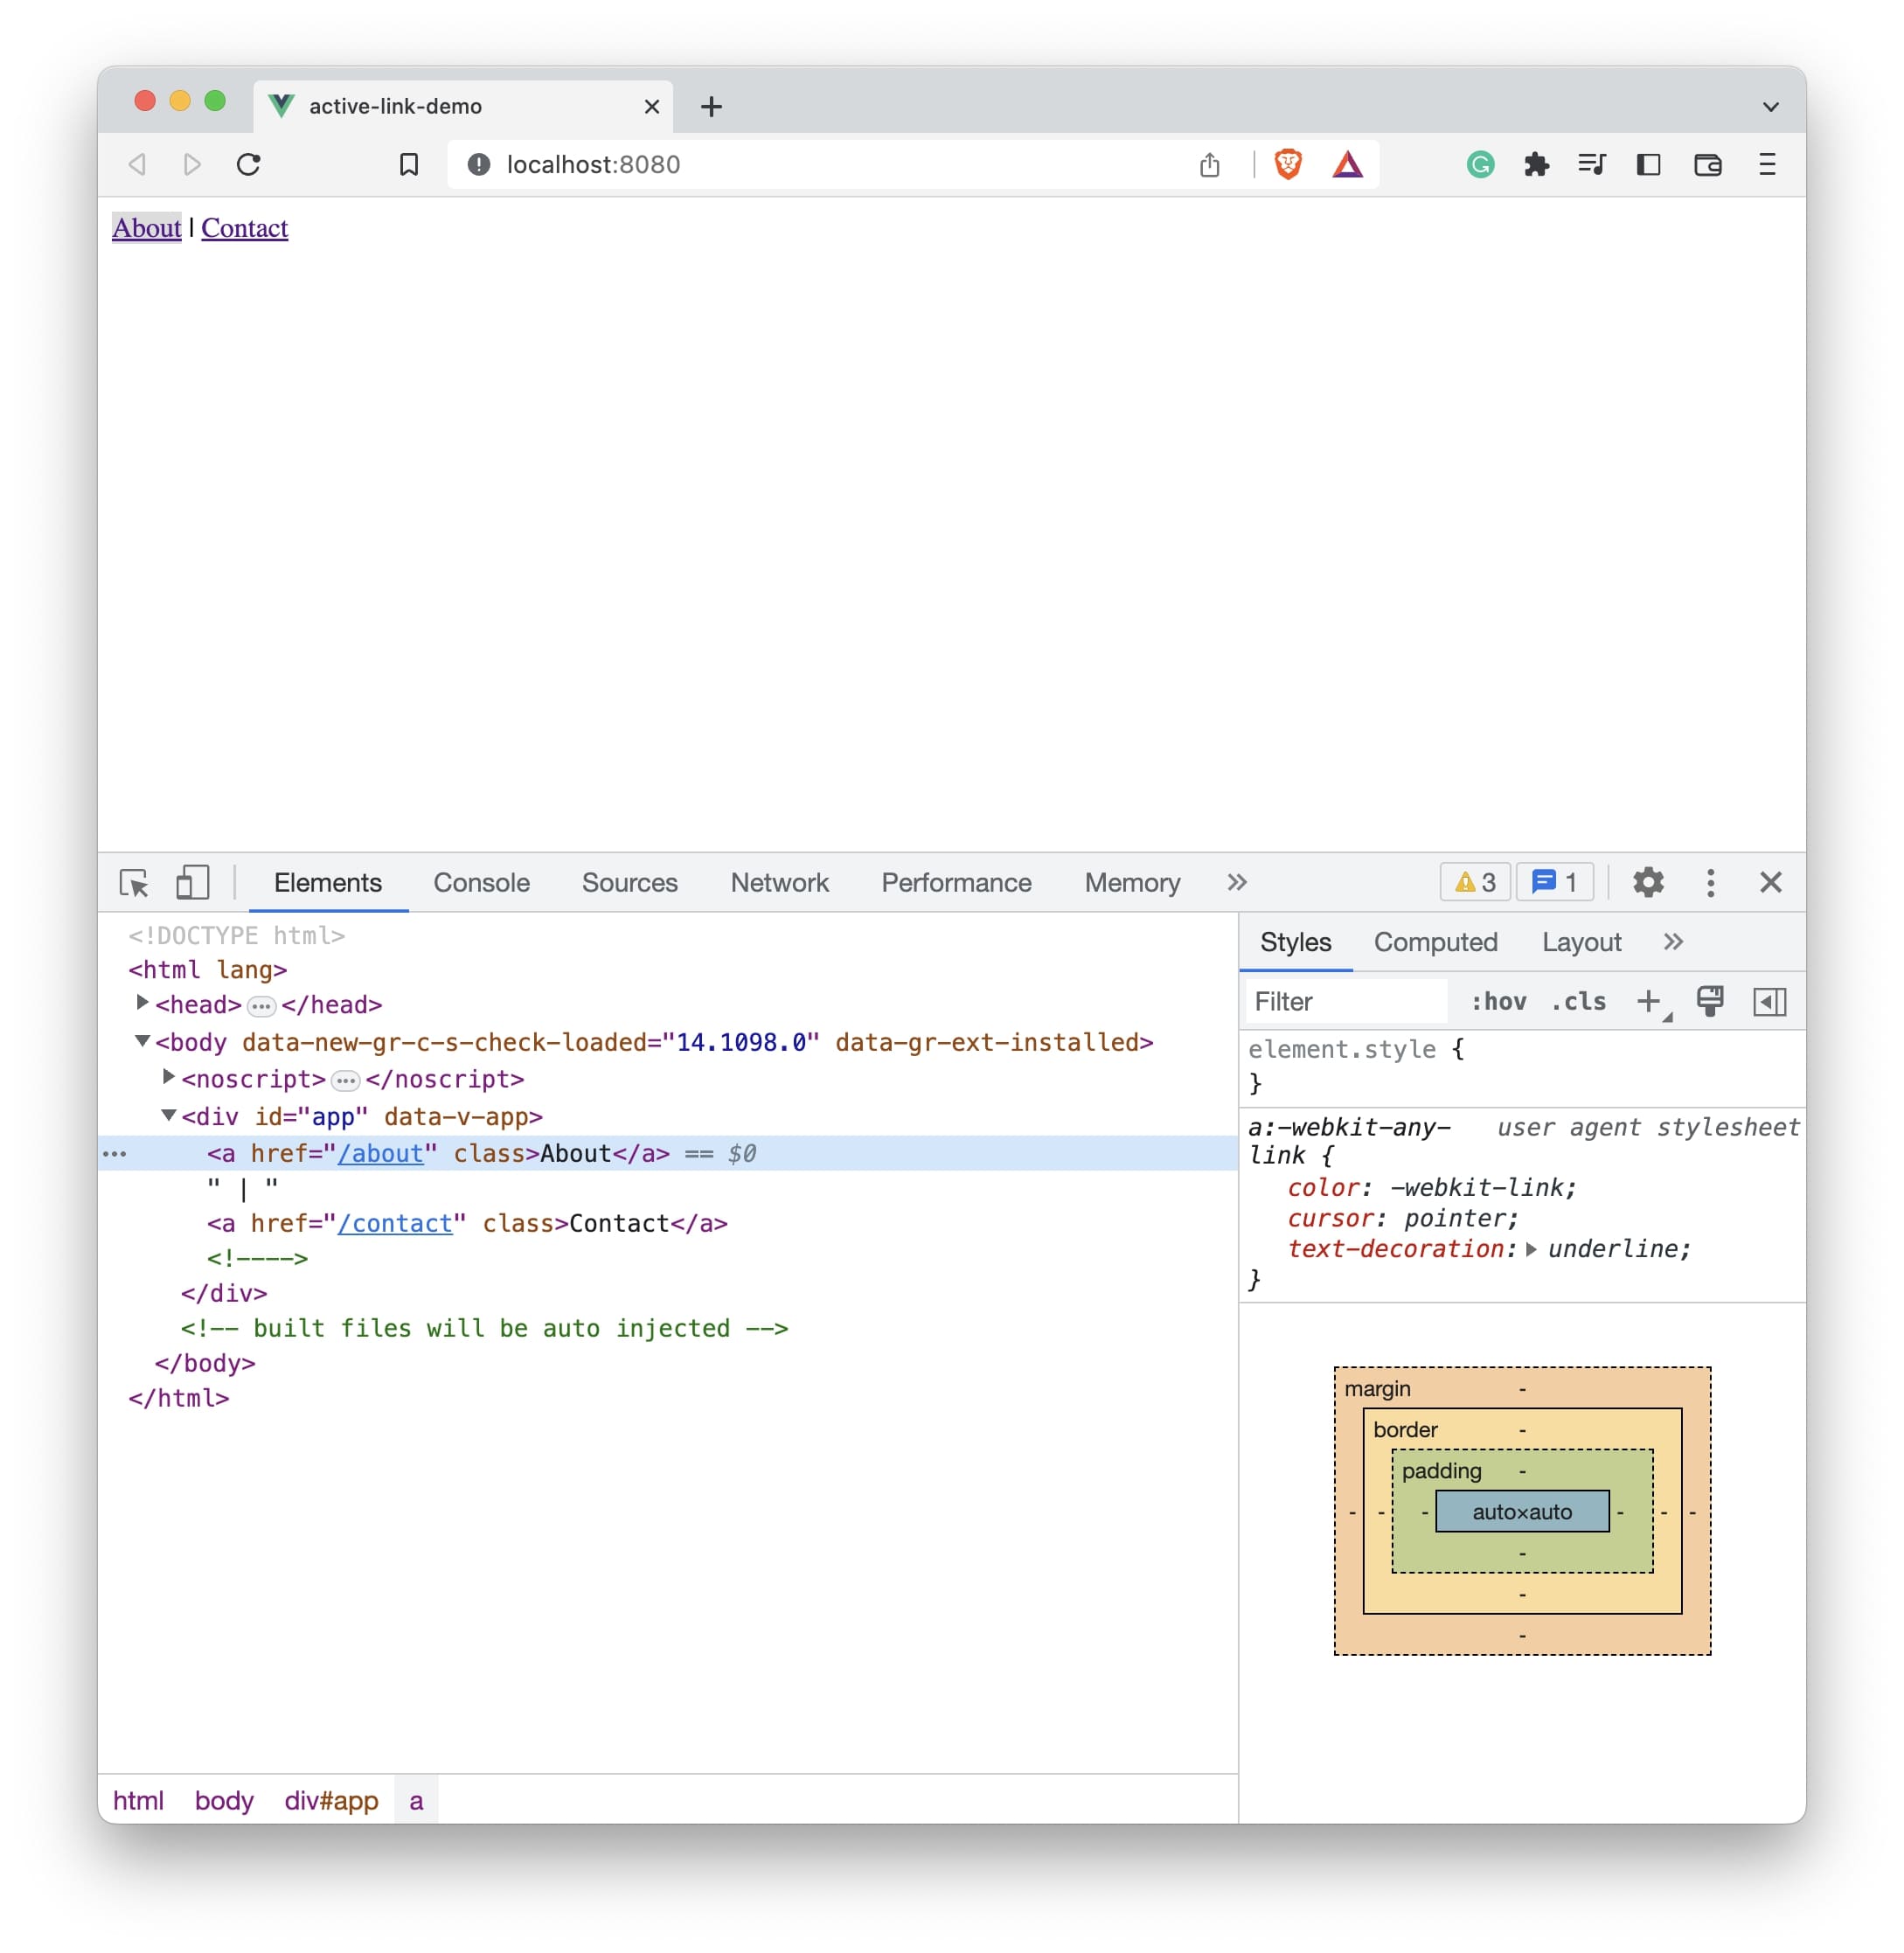
Using the router-link-active class we can style the active link. The <router-link> adds this class when a link is clicked by default.
When the link is not clicked, we have <a> anchor tag with no classes applied.
Once the link is clicked, both two classes get applied.
We can simply apply our css styling to these classes to highlight the active link.
Let’s add the styling in the App.vue file:
<!-- App.vue -->
<style>
a.router-link-active {
  color: aqua;
}
</style>
When the link is clicked, we want the text color to change to aqua.
So the entire App.vue file contains the following code:
<!-- App.vue -->

<template>
  <router-link to="/about">About</router-link> |
  <router-link to="/contact">Contact</router-link>
  <router-view></router-view>
</template>

<script>
export default {
  name: "App",
};
</script>

<style>
a.router-link-active {
  color: aqua;
}
</style>
The output:
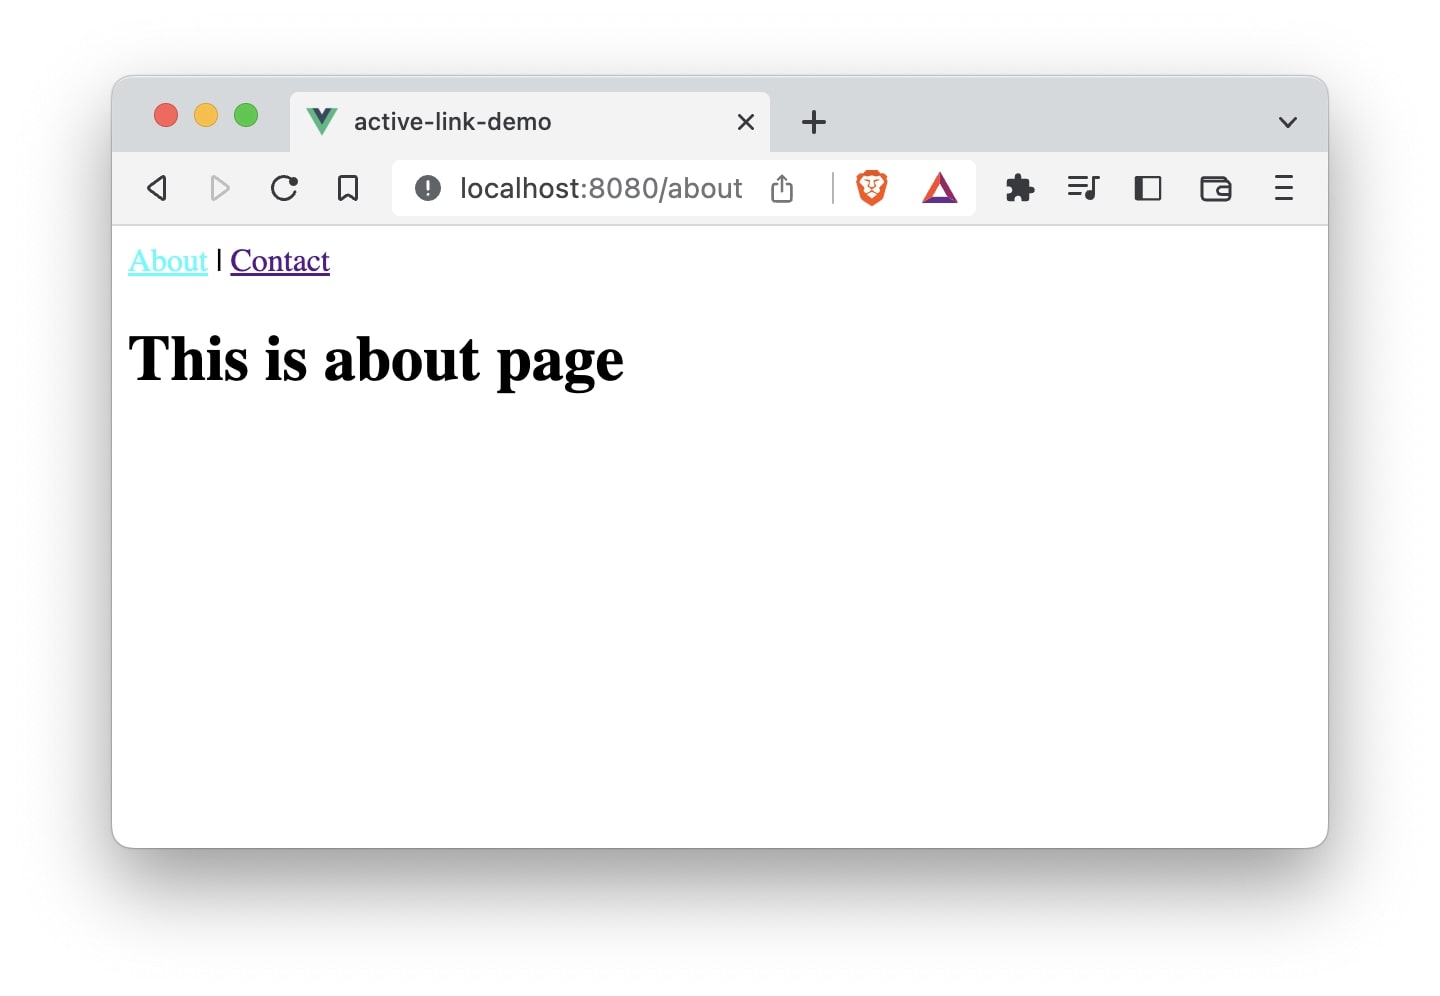
This is how we can style the active link easily in Vue.js.