The style tags in components are global. Any style you apply in a component file will be applicable to the entire application.
There are times when you want to apply some styles to only certain components. In Vue, we can make use of the scoped attribute and apply styles only to that particular component and its children.
In this article, we will look at how to declare and use scoped attribute to style the components.
We will start by creating an application using Vue CLI.
vue create scoped-demo
Once, the installation is complete, we can navigate to the folder and run the server to load the application.
❯ cd scoped-demo
❯ npm run serve
This will run the server on port 8080 http://localhost:8080/
To demonstrate the use of scoped attribute, we will create two component files in the ./src/components folder.
❯ touch src/components/FirstComponent.vue
❯ touch src/components/SecondComponent.vue
We will write basic code to display some text which we will make use of for styling.
// FirstComponent.vue

<template>
  <h2>First Component</h2>
</template>

<script>
export default {
  name: "FirstComponent",
};
</script>
Next, let’s add a similar code in the SecondComponent.vue.
// SecondComponent.vue

<template>
  <h2>Second Component</h2>
</template>

<script>
export default {
  name: "SecondComponent",
};
</script>
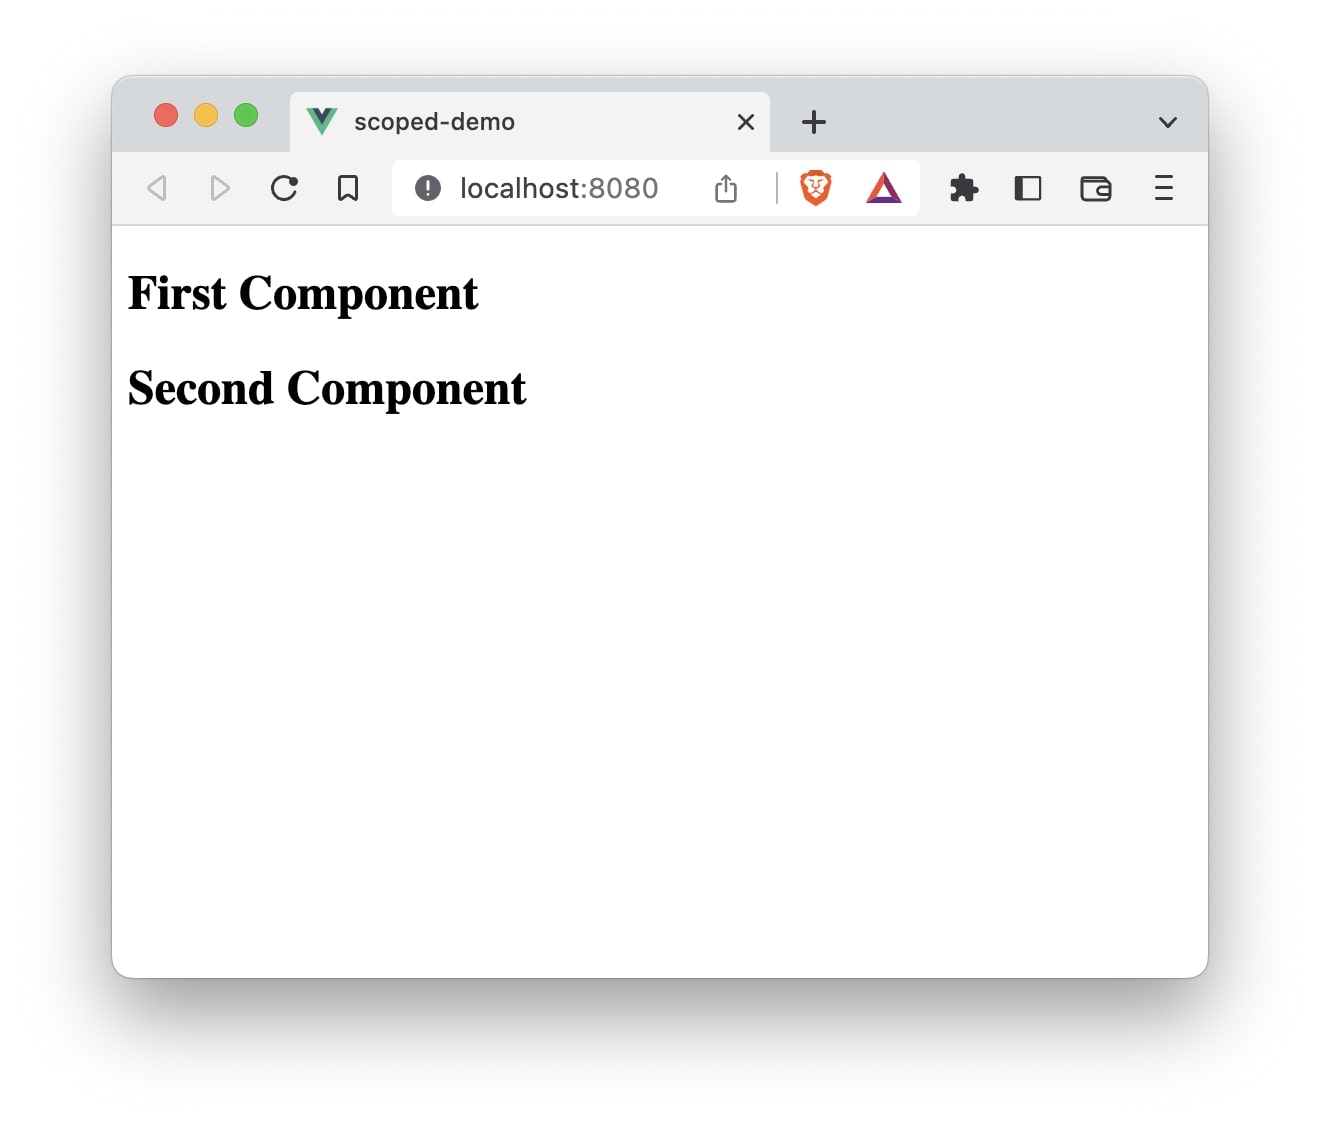
Both files can now be imported into the App.vue file.
//App.vue

<template>
  <FirstComponent />
  <SecondComponent />
</template>

<script>
import FirstComponent from "./components/FirstComponent.vue";
import SecondComponent from "./components/SecondComponent.vue";

export default {
  name: "App",
  components: {
    FirstComponent,
    SecondComponent,
  },
};
</script>
Let’s add some style to the FirstComponent.
// FirstComponent.vue

<template>
  <h2>First Component</h2>
</template>

<script>
export default {
  name: "FirstComponent",
};
</script>

<style>
h2 {
  color: blue;
}
</style>
Here, we are simply changing the color of h2 tag to blue. This change will also reflect in the SecondComponent.
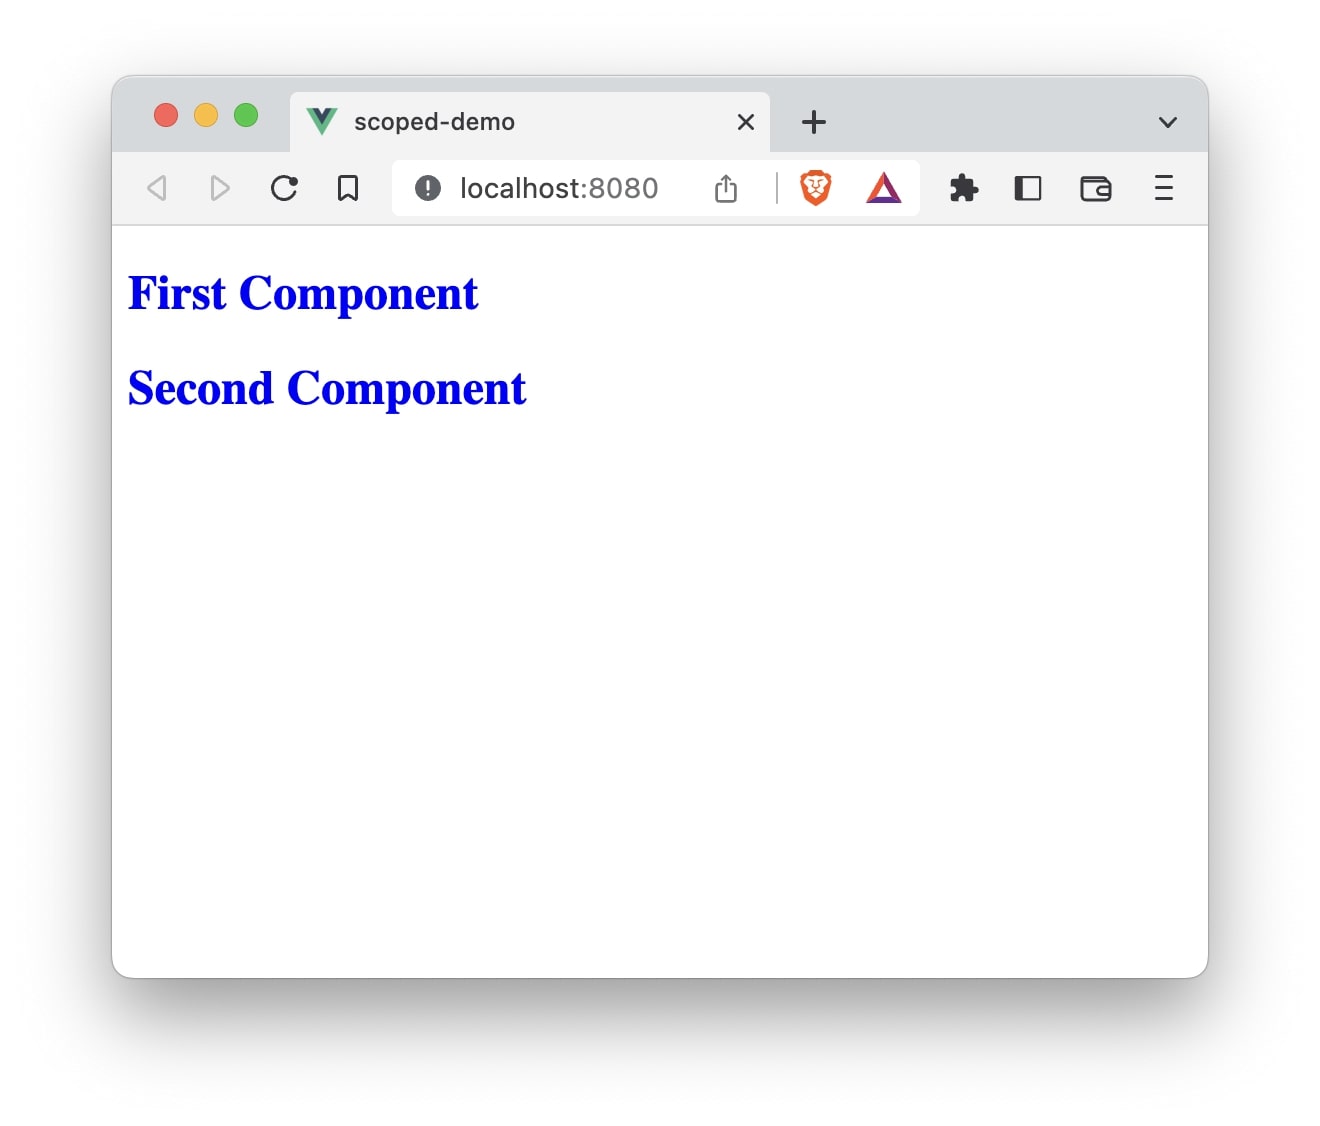
Both the h2 tags are blue in color.
If we want the blue color to only apply if it is FirstComponent, then we can make use of the scoped attribute in the style tag.
// FirstComponent.vue

<template>
  <h2>First Component</h2>
</template>

<script>
export default {
  name: "FirstComponent",
};
</script>

<style scoped>
h2 {
  color: blue;
}
</style>
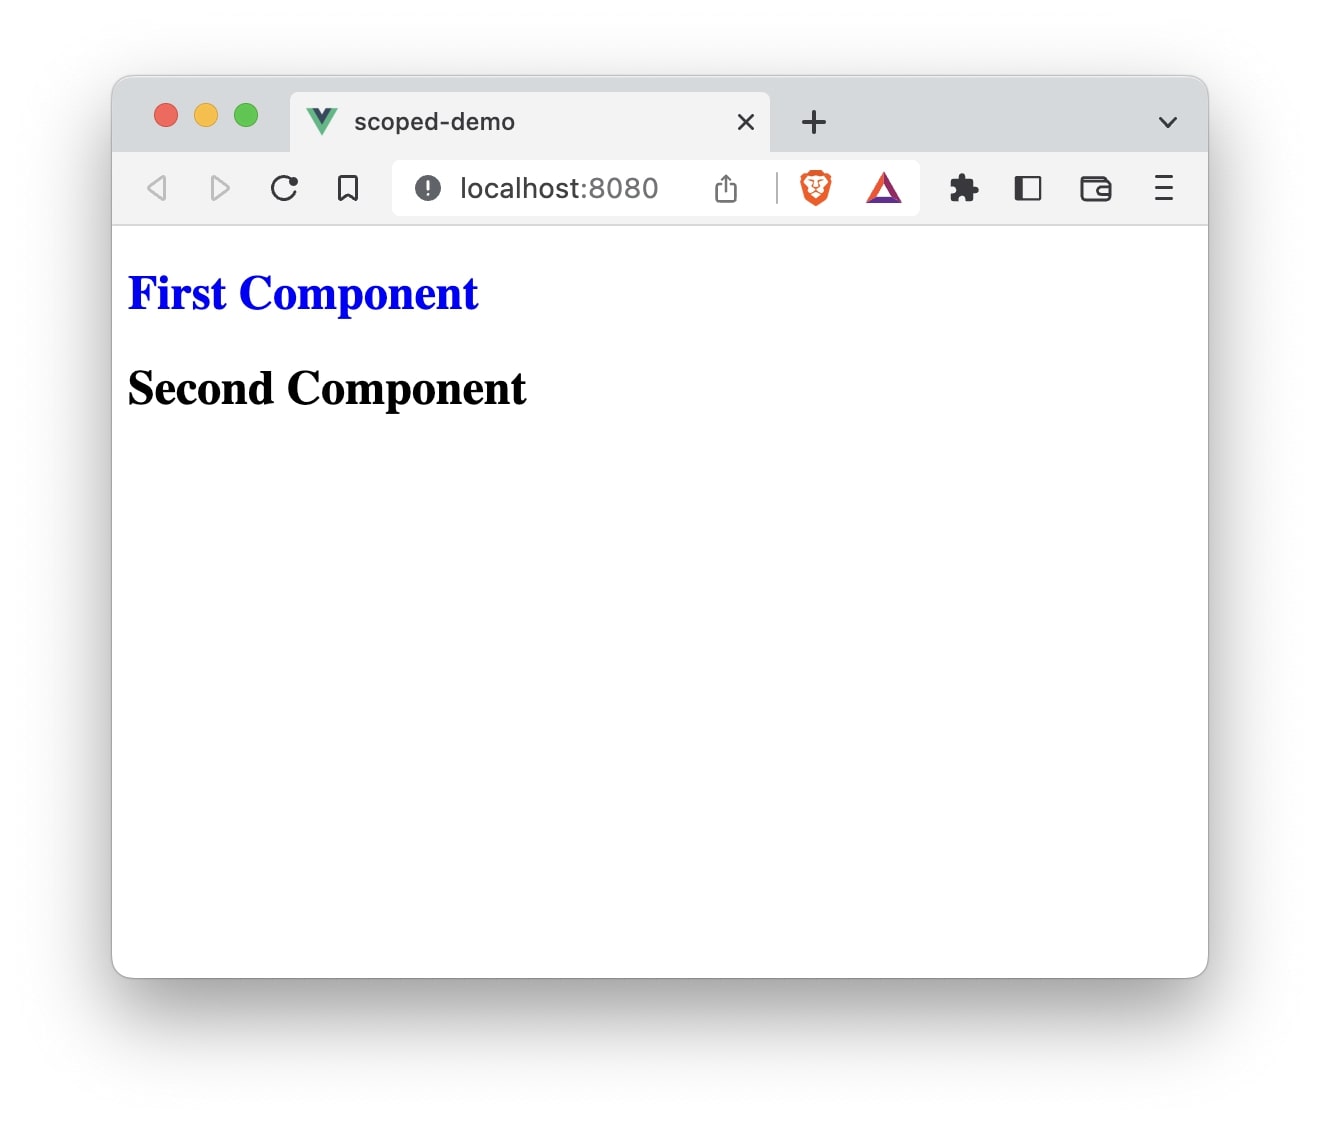
Only the First Component text is in blue. This is because we now have the scoped attribute in the style tag of FirstComponent.
// FirstComponent.vue

<style scoped>
h2 {
  color: blue;
}
</style>
Child Component
The styling is applicable to all the children of the parent component which uses scoped attribute.
For example, let’s make SecondComponent the child component of FirstComponent.
// FirstComponent.vue

<template>
  <h2>First Component</h2>
  <SecondComponent />
</template>

<script>
import SecondComponent from "./SecondComponent.vue";

export default {
  name: "FirstComponent",
  components: {
    SecondComponent,
  },
};
</script>

<style scoped>
h2 {
  color: blue;
}
</style>
We will remove the reference of the SecondComponent from App.vue file.
// App.vue

<template>
  <FirstComponent />
</template>

<script>
import FirstComponent from "./components/FirstComponent.vue";

export default {
  name: "App",
  components: {
    FirstComponent,
  },
};
</script>
As you can see, the styles declared in the FirstComponent using scoped attribute will also apply to the SecondComponent which is the child component.