Slots are used when you want to pass template content from the parent component to the child component. Slots are useful when you want to render different content wrapped in a common outer structure. This common outer structure is defined in the child component and template content to be rendered within is passed from the parent component.
To specify a slot in the child component, we make use of the <slot> element. When Vue sees a <slot> tag, it replaces <slot> tag with the content which is passed from the parent component.
Let’s look at how slots work in Vue with an example.
We will begin by creating a new application using Vue CLI.
❯ vue create slots-demo
Once, the installation is complete, we can navigate to the folder and run the server to load the application.
❯ cd slots-demo
❯ npm run serve
This will run our server on port 8080 by default http://localhost:8080/
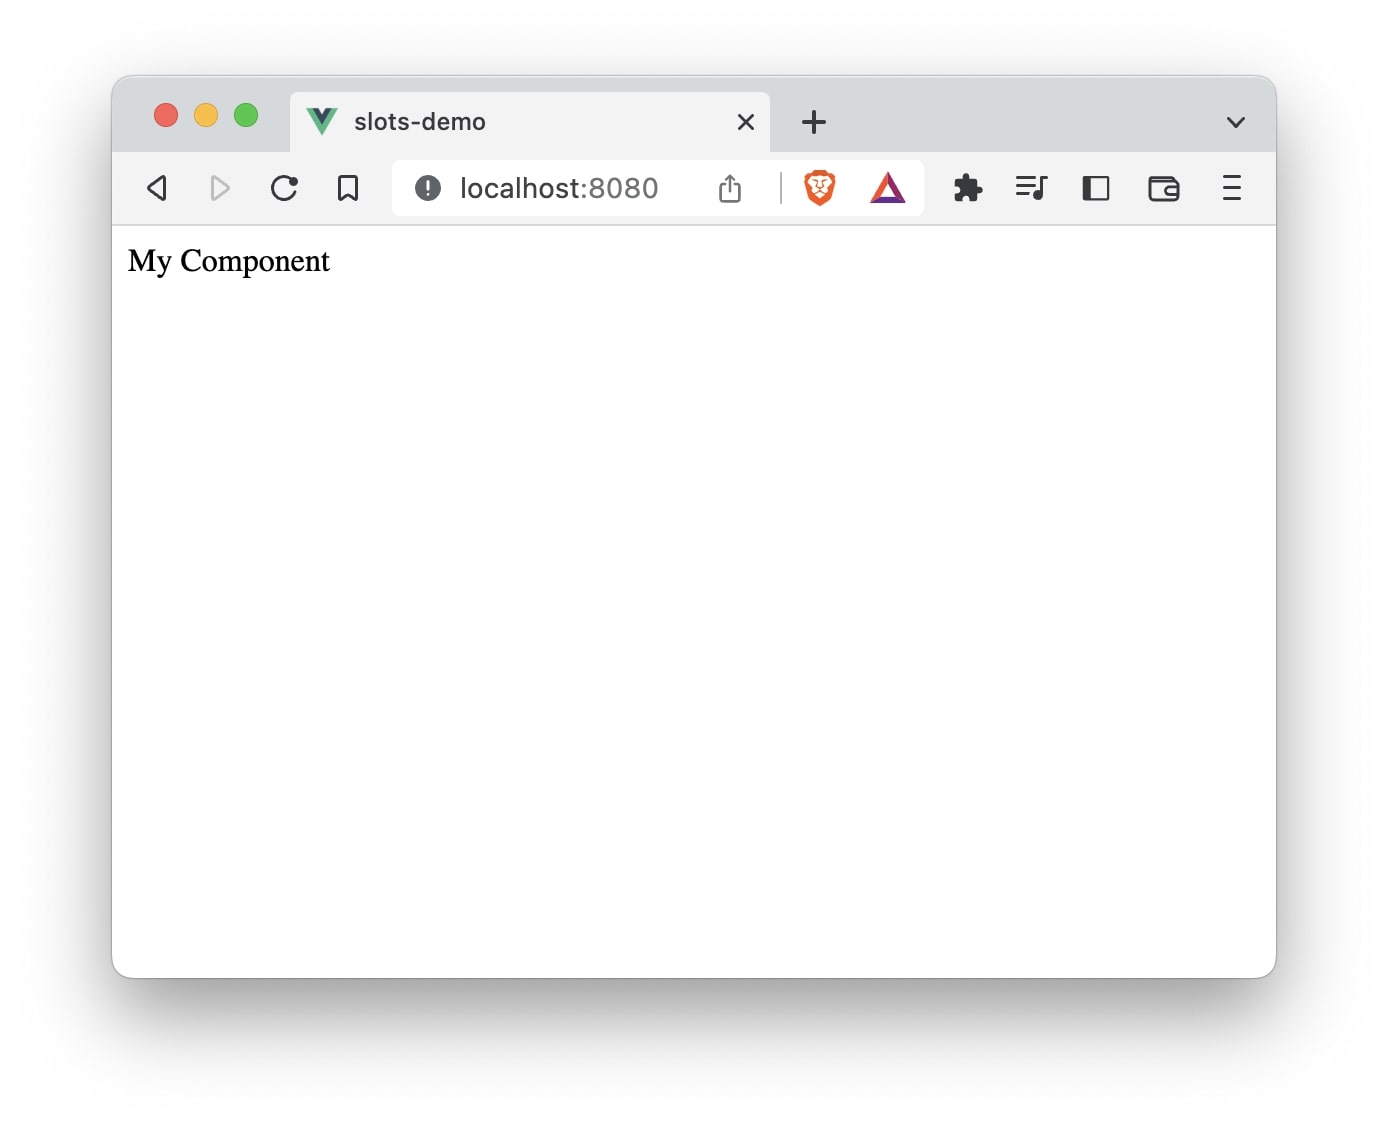
To demonstrate the working of slot we will create a new component called MyComponent.
❯ touch src/components/MyComponent.vue
Let’s add some code in MyComponent.vue.
// MyComponent.vue

<template>
  <div>My Component</div>
  <slot></slot>
</template>

<script>
export default {
  name: "MyComponent",
};
</script>
Notice the use of <slot> tag. This is where we will be replacing the template content from parent component.
Now, let’s edit App.vue to include the MyComponent.vue file.
// App.vue

<template>
  <MyComponent />
</template>

<script>
import MyComponent from "./components/MyComponent.vue";

export default {
  name: "App",
  components: {
    MyComponent,
  },
};
</script>
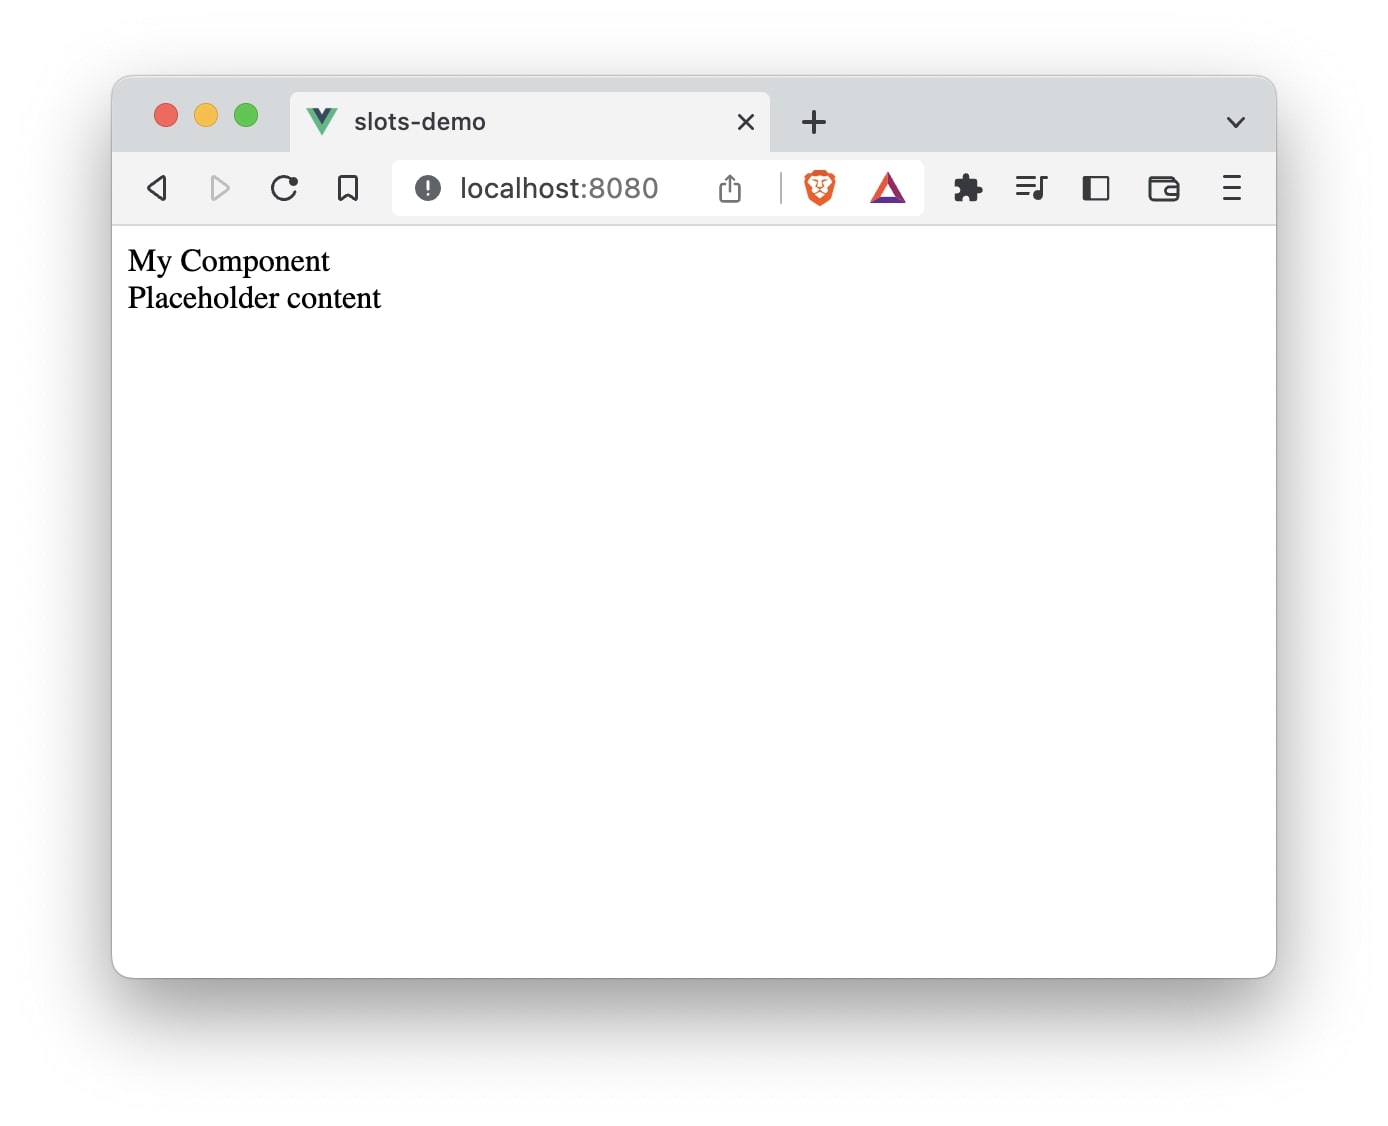
In the App.vue which is the parent component, we are not sending any template for now. If you want to add a placeholder in slot if there is no content that is passed, we can do so:
<slot>Placeholder content</slot>
In case, there is no content from the parent component, the above text will show up.
// MyComponent.vue

<template>
  <div>My Component</div>
  <slot>Placeholder content</slot>
</template>

<script>
export default {
  name: "MyComponent",
};
</script>
Now let’s pass some template to replace the slot tag.
// App.vue

<MyComponent>
  <div>
    <h2>This text will replace slot element</h2>
  </div>
</MyComponent>
The entire App.vue file:
// App.vue

<template>
  <MyComponent>
    <div>
      <h2>This text will replace slot element</h2>
    </div>
  </MyComponent>
</template>

<script>
import MyComponent from "./components/MyComponent.vue";

export default {
  name: "App",
  components: {
    MyComponent,
  },
};
</script>
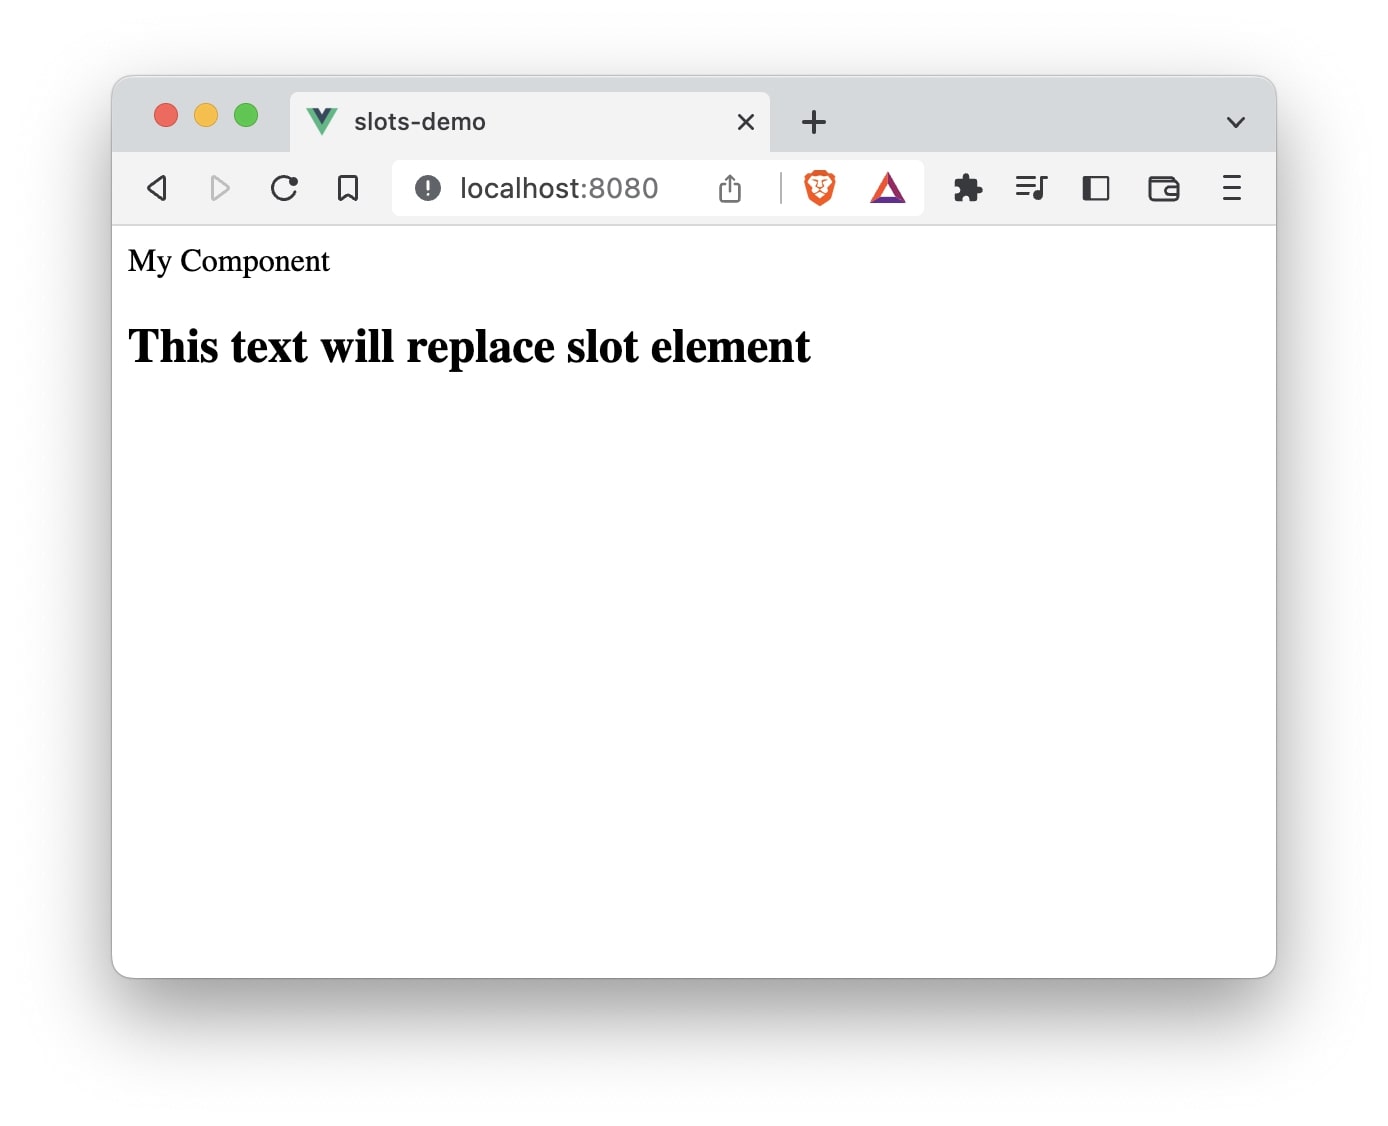
As you can see from the above screenshot, <slot></slot> is replaced by the template content from the parent component.
How to implement multiple slots? (Named slots)
Naming slots is necessary when you have multiple slots in a single component. The <slot> contains an attribute name which can be assigned a name to differentiate one slot from the other.
<slot name="header"></slot>
<slot name="footer"></slot>
If you do not specify a name to slot, the value of name attribute will be default.
To pass template content from the parent component, we make use of the <template> element and v-slot directive along with the name of the slot.
<template v-slot:header></template>
The shorthand for v-slot is #. So we can write,
<template #header>

</template>
Using this information, let’s implement multiple slots in our example.
We will add two slots named sidebar and search in the component MyComponent.
// App.vue

<MyComponent>
    <template #search>
      <div>
        <input type="text" />
        <button>Search</button>
      </div>
    </template>

    <template #sidebar>
      <ul>
        <li>Posts</li>
        <li>About</li>
        <li>Contact us</li>
      </ul>
    </template>
  </MyComponent>
The entire App.vue file:
<template>
  <MyComponent>
    <template #search>
      <div>
        <input type="text" />
        <button>Search</button>
      </div>
    </template>

    <template #sidebar>
      <ul>
        <li>Posts</li>
        <li>About</li>
        <li>Contact us</li>
      </ul>
    </template>
  </MyComponent>
</template>

<script>
import MyComponent from "./components/MyComponent.vue";

export default {
  name: "App",
  components: {
    MyComponent,
  },
};
</script>
In this example, we have two <template> elements to pass the content. Using the shorthand for v-slot directive, we specify the name of slots #search and #sidebar.
We need to specify the name attribute for the <slot> elements in the MyComponent to use them.
// MyComponent.vue
<slot name="search"></slot>
<slot name="sidebar"></slot>
The entire MyComponent.vue file:
<template>
  <div>My Component</div>
  <slot name="search"></slot>
  <slot name="sidebar"></slot>
</template>

<script>
export default {
  name: "MyComponent",
};
</script>
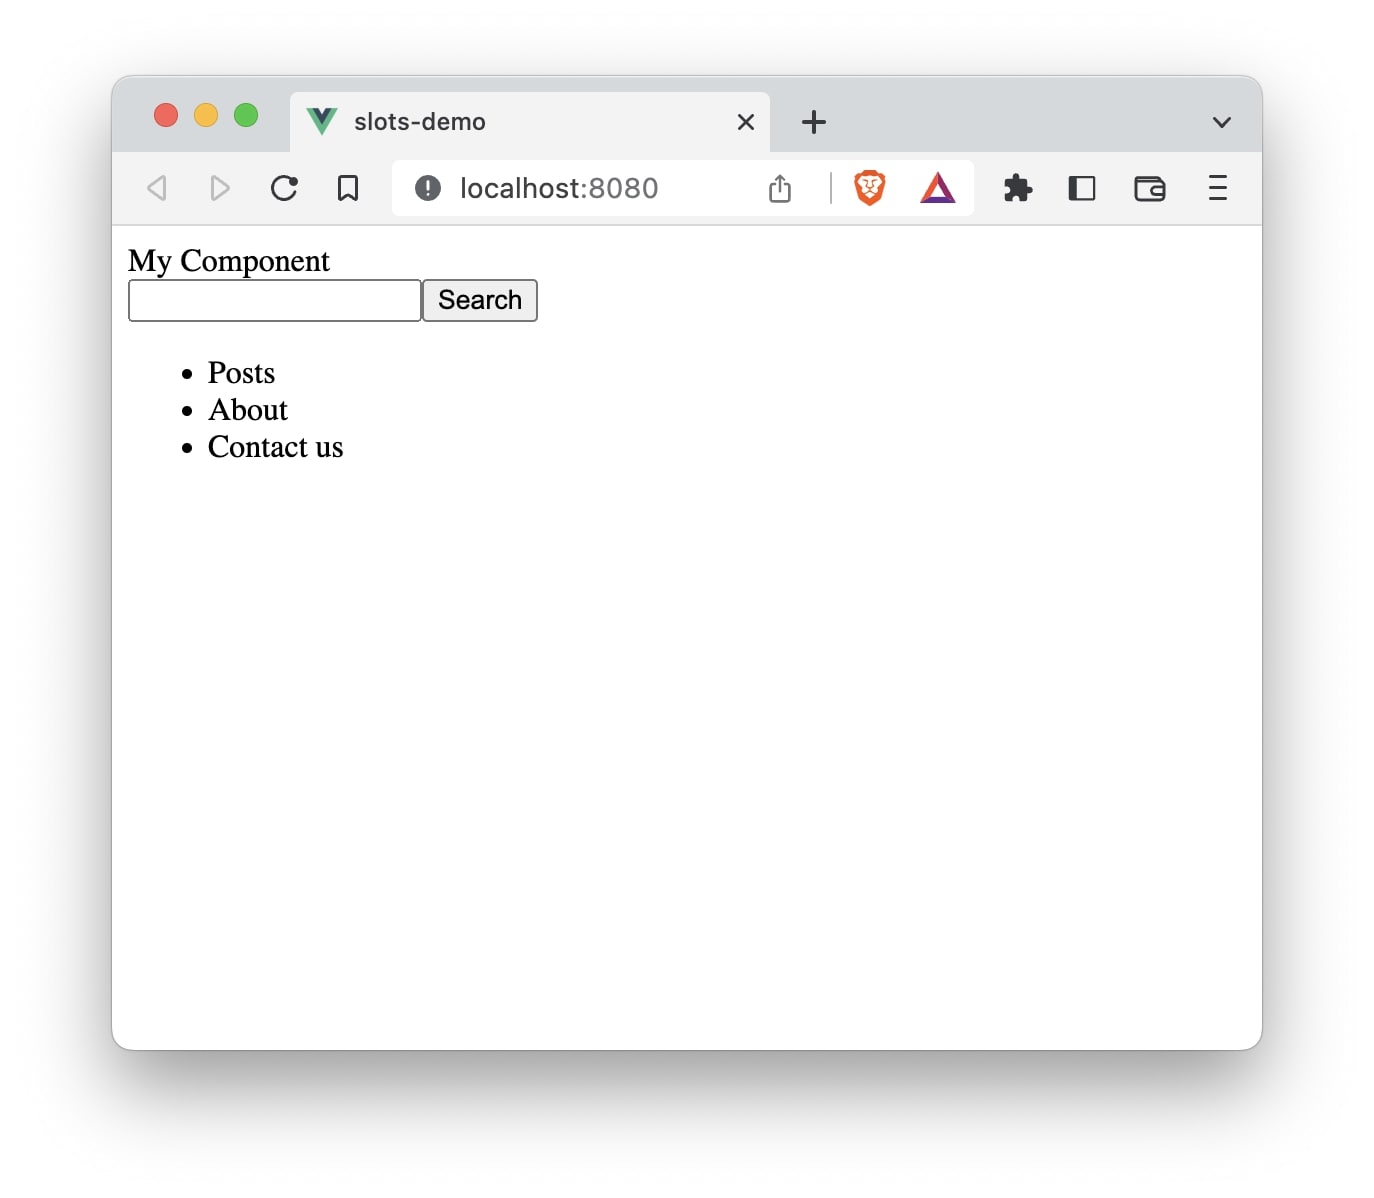
As you can see, both the slots are now replaced by the respective templates defined in the parent component.
Scoped Slots
There are times when you may want the parent component’s template content to make use of data passed from the slot of the child component.
For example,
Let’s say we have a product component that lists all the products in an e-commerce site. We want this component to be reusable since, product lists can get displayed on different sections of the website. But the styling or the HTML structure may differ from one page to another. Using slots makes sense in this case.
However, we will not need a way to send the product information from the product component to the parent component that will make use of the data. To achieve this, just like using props, we can declare attributes that can hold values in a <slot> element. These attributes are then available to be used by the parent component.
To demonstrate this, let’s first create a ProductComponent.vue file which will contain products data.
// Terminal
❯ touch src/components/ProductComponent.vue
This will create a file for us. Let’s open the file and start implementing the logic to display products.
// ProductComponent.vue

<template>
  <div v-for="product in products" :key="product.id">
    <slot :item="product.name" :price="product.price"></slot>
  </div>
</template>

<script>
export default {
  data() {
    return {
      products: [
        {
          id: 1,
          name: "Jeans",
          price: "$29",
        },
        {
          id: 1,
          name: "Shirt",
          price: "$15",
        },
        {
          id: 1,
          name: "Hoodie",
          price: "$30",
        },
      ],
    };
  },
};
</script>
In this case, we have declared data products which is an array of product objects. In the template, we are looping through the products and passing the values of individual product to the <slot> element. Since, the values are dynamic, we are binding them using shorthand of v-bind which is ":".
There are two attributes passed to the <slot> element, item and price.
// ProductComponent.vue

<slot :item="product.name" :price="product.price"></slot>
In our parent component App let’s create a template content that will make use of the above data that is being passed from the child component ProductComponent.
// App.vue

<ProductComponent>
  <template v-slot="productProps">
    <h2>{{ productProps.item }}</h2>
    <p>Price: {{ productProps.price }}</p>
  </template>
</ProductComponent>
The productProps will contain all the slot properties that get passed from the <slot> element. Individual properties are accessed using productProps.item andproductProps.price.
The entire App.vue file:
// App.vue

<template>
  <MyComponent>
    <template #search>
      <div>
        <input type="text" />
        <button>Search</button>
      </div>
    </template>

    <template #sidebar>
      <ul>
        <li>Posts</li>
        <li>About</li>
        <li>Contact us</li>
      </ul>
    </template>
  </MyComponent>

  <ProductComponent>
    <template v-slot="productProps">
      <h2>{{ productProps.item }}</h2>
      <p>Price: {{ productProps.price }}</p>
    </template>
  </ProductComponent>
</template>

<script>
import MyComponent from "./components/MyComponent.vue";
import ProductComponent from "./components/ProductComponent.vue";

export default {
  name: "App",
  components: {
    MyComponent,
    ProductComponent,
  },
};
</script>
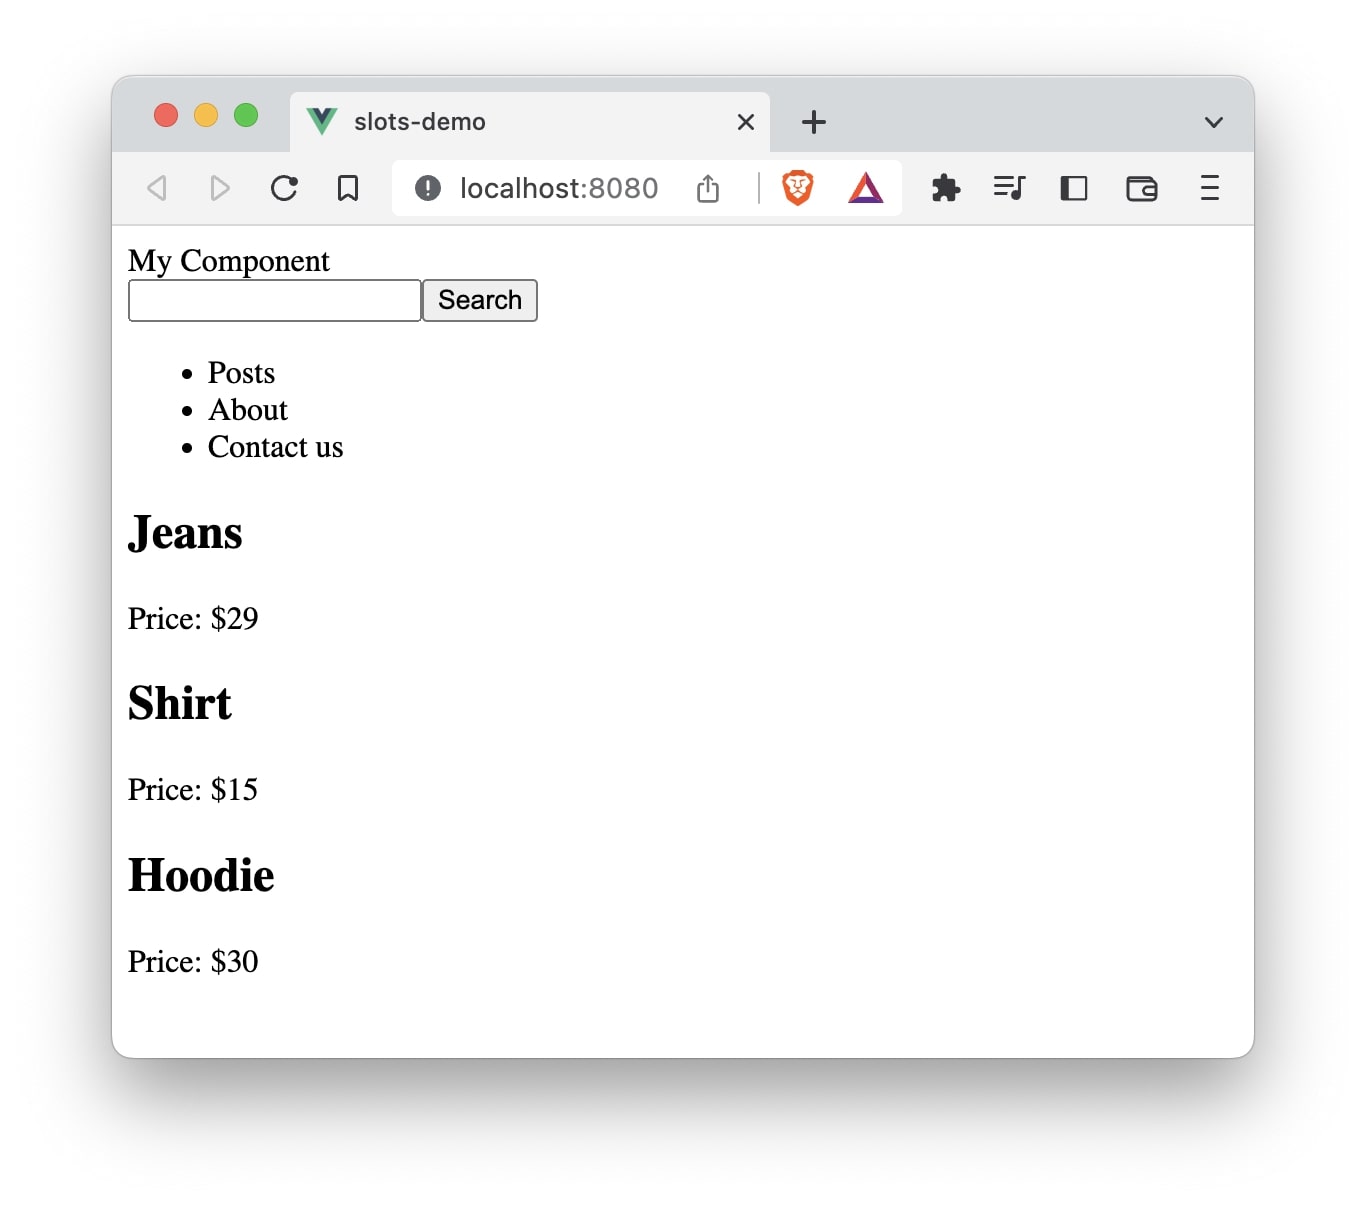
As you can see, the slot is replaced by the content along with the data passed from the child component.
Name Scoped Slots
You can also use the name attribute along with the scoped slots when dealing with multiple slots.
// App.vue

<ProductComponent>
    <template v-slot:products="productProps">
      <h2>{{ productProps.item }}</h2>
      <p>Price: {{ productProps.price }}</p>
    </template>
  </ProductComponent>
Here, we are using v-slot:products where products is the name of the slot.
Similarly, you can also use shorthand:
// App.vue

<ProductComponent>
    <template #products="productProps">
      <h2>{{ productProps.item }}</h2>
      <p>Price: {{ productProps.price }}</p>
    </template>
  </ProductComponent>
In the ProductComponent.vue file we can send this name attribute like below.
// ProductComponent.vue

<slot name="products" :item="product.name" :price="product.price"></slot>